Don’t know what to do while self-quarantined with kids? Cook with them! Today I’m sharing easy recipes for kids to make with ideas for every age and ability that will bring some sunshine into your life!

It’s no secret I love to cook with my kids and they love to cook, too! Even though I love to cook with my kids it can be difficult sometimes. Usually there is more mess, it takes a little longer and you may even get a meltdown or two….. But the most important thing I try to remember is that I am teaching my children a life skill and creating memories that will last a lifetime.
If you’ve been waiting for the perfect time to nourish relationships with your family and create more memories, there is no better time than now to start.
Here are 10 amazing benefits that cooking with your kids can yield:
- It’s a great way to bond and connect with your kids.
- It engages all five senses.
- Teaches math, science, and reading skills.
- Can reduce picky eating.
- Helps develop fine motor skills.
- Gives children a sense of pride and accomplishment.
- Builds social and listening skills.
- Can be used as a therapeutic activity for many disabilities.
- It’s an essential life skill for a healthy lifestyle.
- It’s FUN!
Like everyone else, we are doing our part to stop the spread of Coronavirus by physically distancing ourselves from others.
The days may feel long and be filled with worry or loneliness, and quarantining may seem never-ending, but your family still needs you to show up. And I’m willing to bet that you yourself need that, too! I have seen so much good come out of this and I honestly feel like my family is stronger because of it.
The way I see it, cooking can be a great way to divert your attention away from the craziness of the world and keep kids entertained, while at the same time encouraging children’s thinking and creativity. Kids are like sponges; they soak up so much information as their brains develop.
In addition, kids can use the knowledge they have learned and apply it by counting, measuring, following a sequence, and following directions in recipes. Think of all the homeschooling you can do by just cooking with them.
Why not teach useful cooking skills while at the same time spending quality time with each other?
So, let’s make some lemonade from that pile of lemons in front of so many of us!
Here are some of my favorite easy recipes for kids to make!
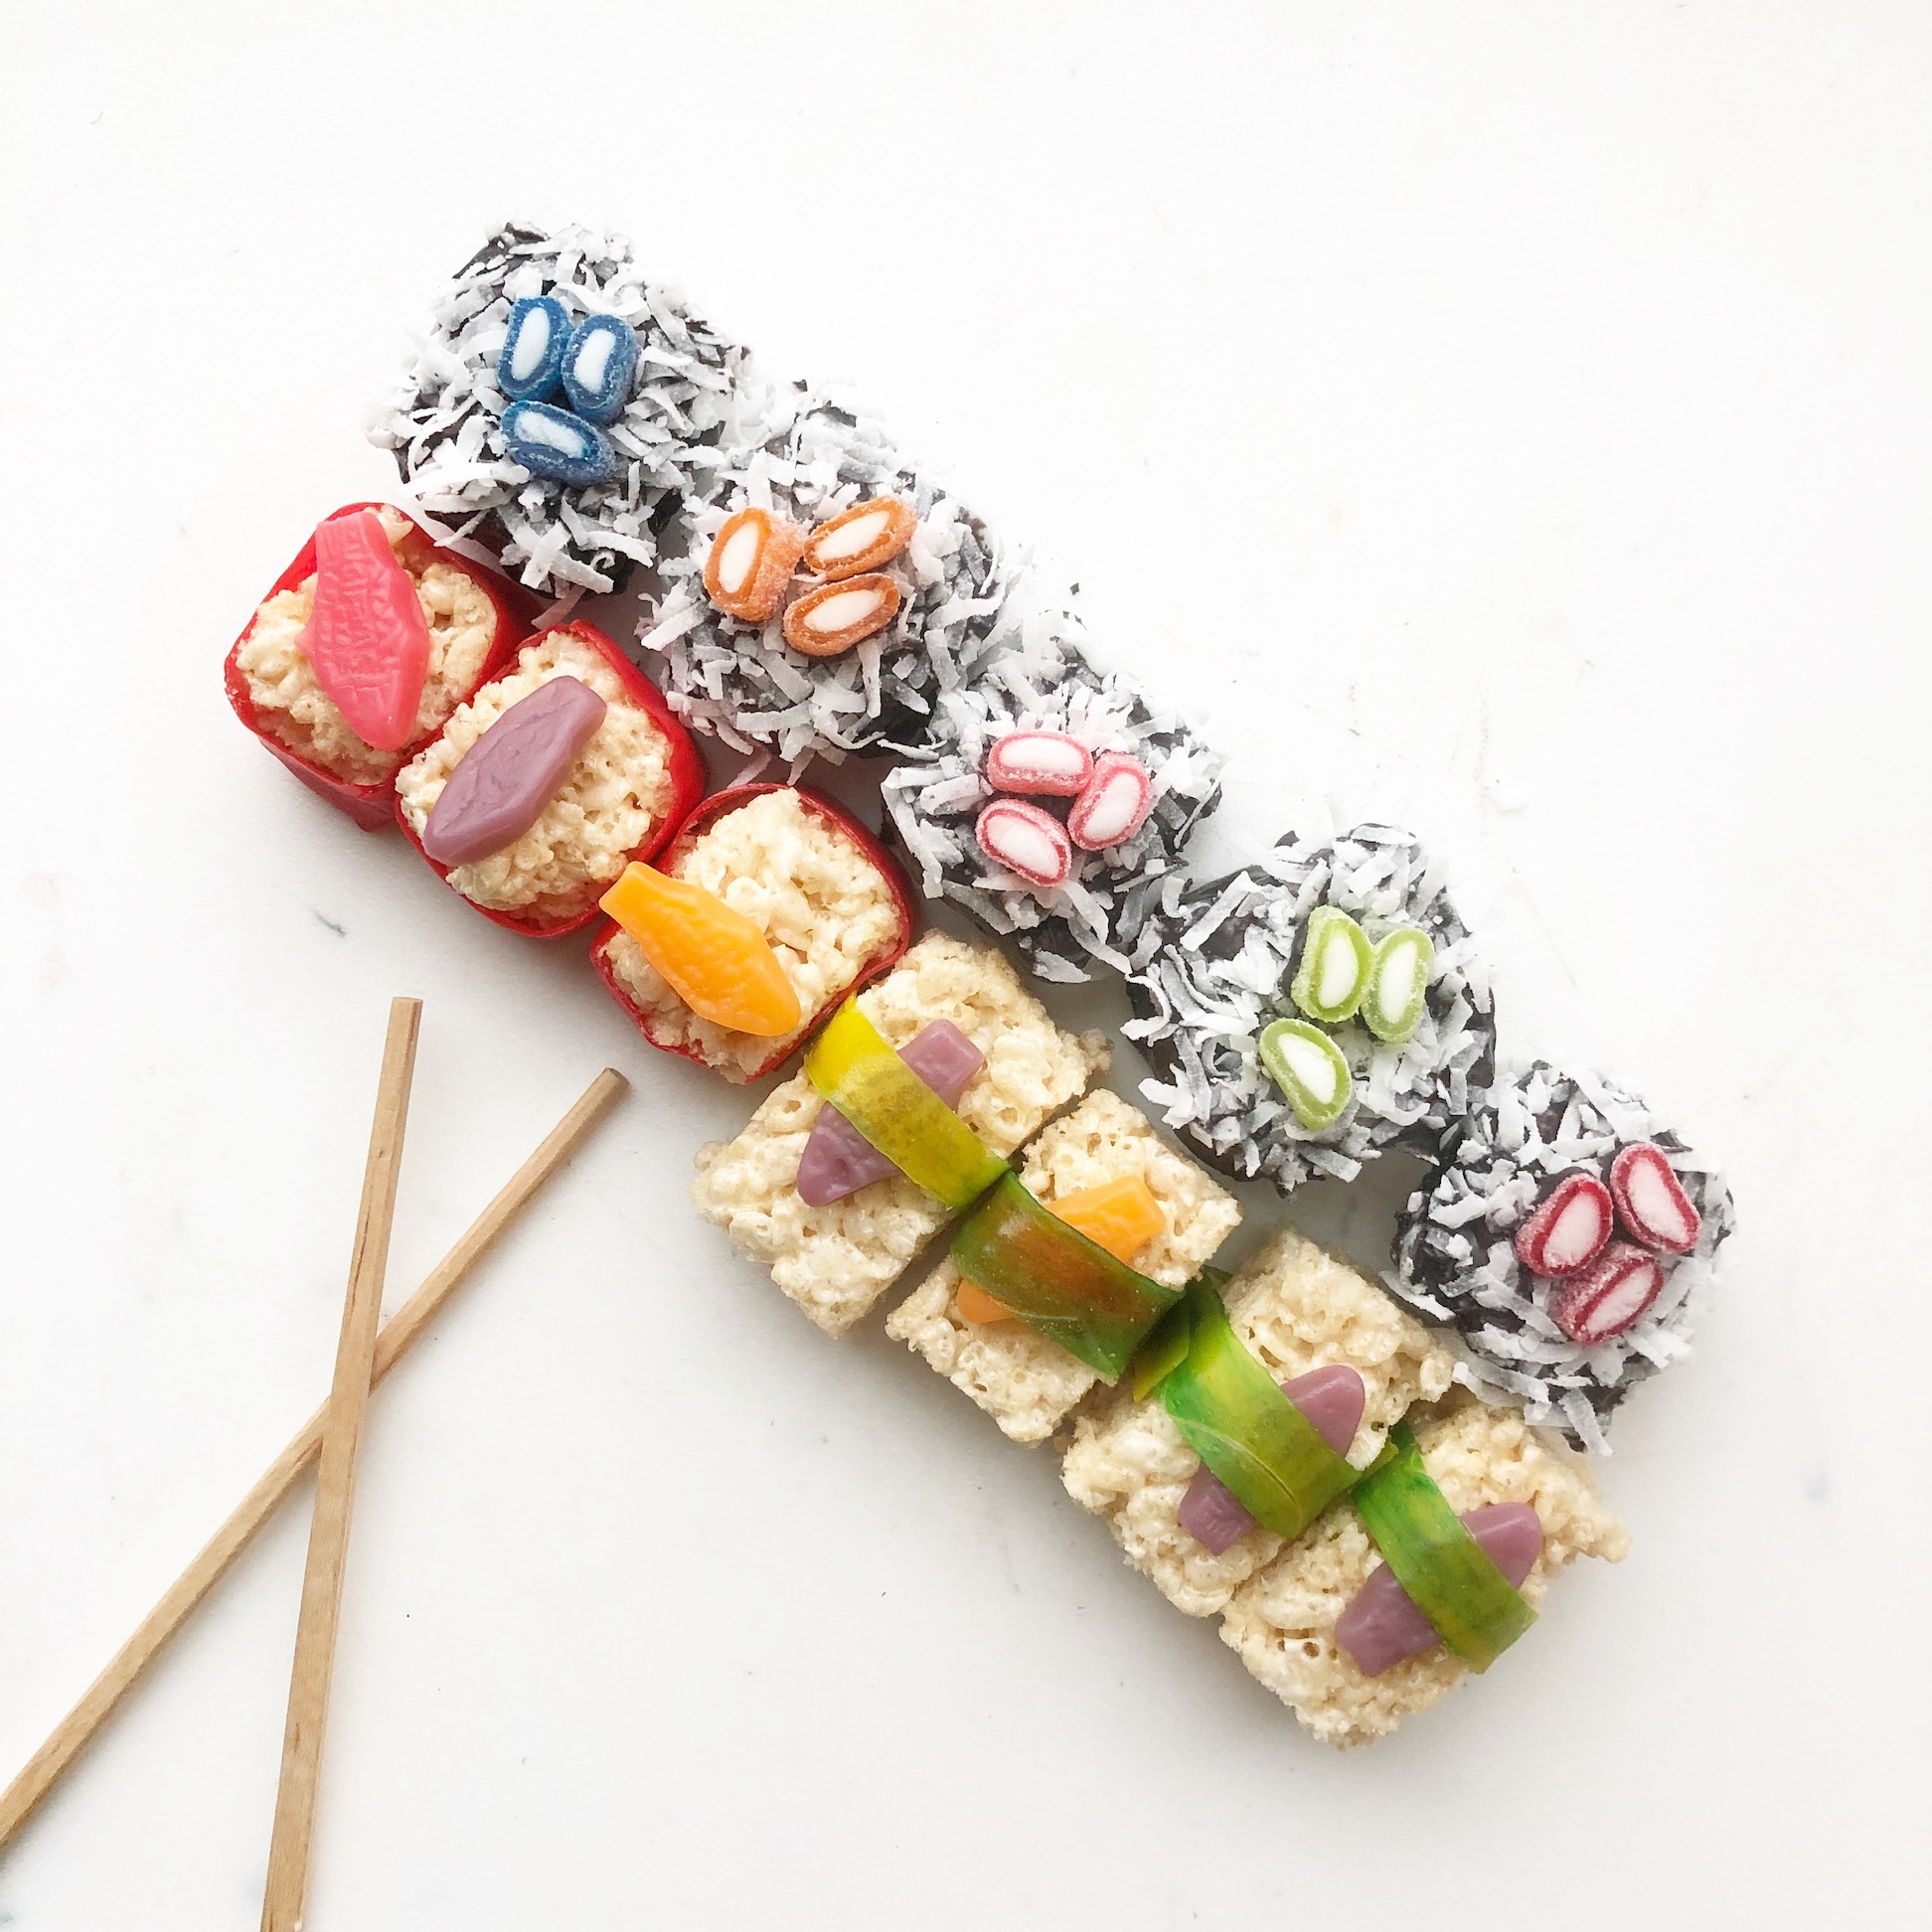
Candy Sushi:
I love this recipe because it doesn’t even need a recipe. I buy pre-made Rice Krispy Bars, cut them into small rectangles and squares, and then wrap some of them in fruit roll ups and dip the rest in melted chocolate and shredded coconut. Then top all of them with fun candy like Swedish fish and diced sour straws.
The kids go crazy when we make these! We even get to practice our chopstick skills.

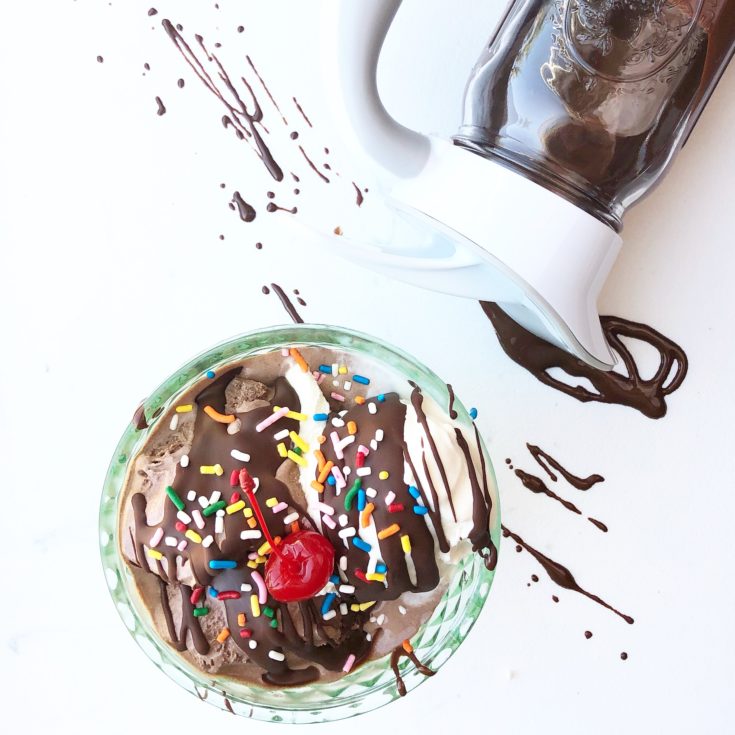
Chocolate Shell:
Have you ever heard of magic shell? It’s really like magic! You drizzle the chocolate sauce over ice cream and instantly it becomes hard like a shell. It totally reminds me of a dipped ice cream cone!
What causes the hardening shell effect, you ask? Coconut oil! Coconut oil is some crazy stuff. It is liquid in warm temperatures, and instantly hardens when it hits cold temperature!
My kids love to see the change and use this recipe for when we do ice cream sundaes. I’m sure your kids (and you!) will be awed as you drizzle it onto ice cream.
Homemade Chocolate Shell Syrup
Homemade chocolate shell syrup is a healthier option than the store bought stuff and hardens as soon as it hits the ice cream.
Ingredients
- 2 Cups Semi-Sweet Chocolate Chips
- 3 Tablespoons Coconut Oil (Solid)
- 1/4 Teaspoon Vanilla Extract
Instructions
1. Combine all of the ingredients in a small microwave-safe bowl.
2. Microwave for 30 seconds. Stir to combine and microwave for another 30 seconds. *If mixture has not melted completely, you can microwave for another 15-20 seconds.
3. Pour into a mason jar topped with your Ergo Spout® and pour over ice cream.
Recommended Products
As an Amazon Associate and member of other affiliate programs, I earn from qualifying purchases.
Nutrition Information:
Yield:
10Serving Size:
1Amount Per Serving: Calories: 204Total Fat: 14gSaturated Fat: 10gTrans Fat: 0gUnsaturated Fat: 4gCholesterol: 0mgSodium: 4mgCarbohydrates: 22gFiber: 2gSugar: 19gProtein: 1g
Tortilla Painting:
Grab a tortilla or even a slice of bread and some food coloring. I mix the food coloring with a little water and then paint the food coloring onto the tortilla with a clean paint brush. You can even make quesadillas or tacos with your painted tortillas. Don’t Let them go to waste!
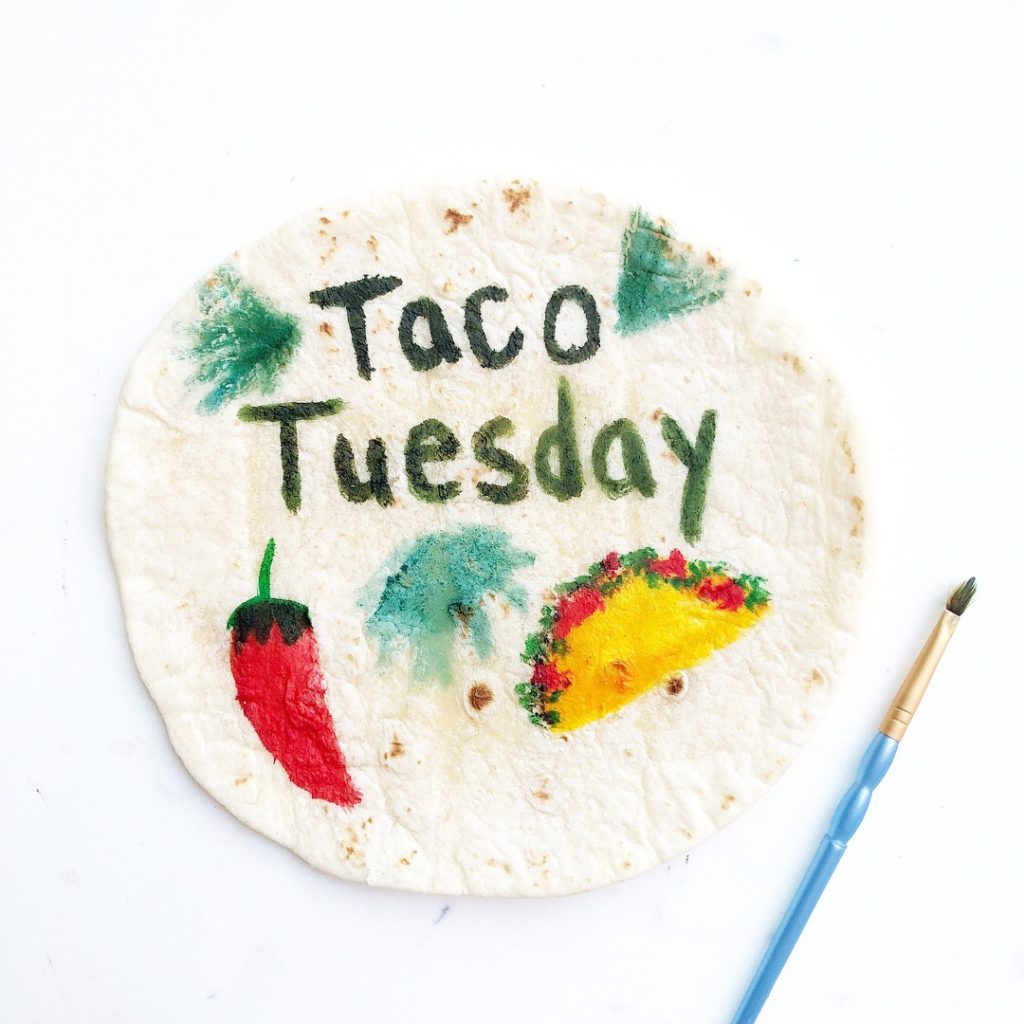
Food Painting
Bread in a Bag:
What better way to make memories than making homemade bread! This is such a fun and comforting recipe to make with kids. The recipe is great for parents because it’s minimal clean up and mess since the dough is made in a Ziploc bag.
You can make this in mini loaf pans as you see below or make them into soft pretzels.
Talk about yeast and how warmth and sugar activates it. You can talk about the chemical reactions of fermenting and how yeast makes bread rise and become fluffy.
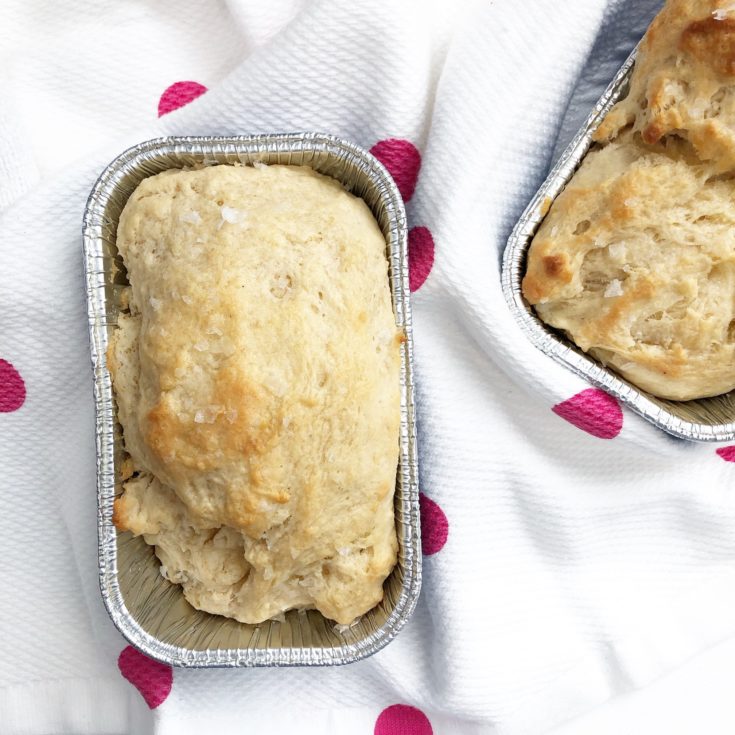
Bread In a Bag
A fun recipe to make with kids that is minimal clean up.
Ingredients
- 1 Tablespoon Dry Active Yeast
- 3 Tablespoons Brown Sugar
- 1 Cup Milk, Warm
- 2 Tablespoons Butter, Diced
- 2 Cups All Purpose Flour
- 1 Teaspoon Salt
To Top:
- 1/2 Cup Butter, Melted
- Kosher Salt or Flaked Sea Salt (I recommend Maldon Salt)
Instructions
- Place the yeast and brown sugar into a large Ziploc gallon-size bag.
- Warm the milk in the microwave for about 40 seconds. Make sure it is warm, but not hot, or it will kill your yeast.
- Add the milk to the yeast mixture. Zip up the bag and let sit for 10 minutes to activate the yeast. The yeast should look foamy when activated.
- When the yeast is activated add the butter, flour, and salt and remove the air from the bag. Zip up the bag and let the kids mix the mixture with their hands by pressing the baggie until the flour is combined.
- The dough may be a little sticky and that is okay. Open the bag and set the bag in a bowl so the contents won't spill out. Let the bag sit in a warm place for 1 hour or until it has doubled in size.
- Preheat the oven to 350°F. Melt the 1/2 cup butter in a small bowl.
- Dip your hands into the melted butter and grab about 1 1/2 cup of the dough (the butter will help prevent the dough from sticking to your hands.)
- Place the dough in a mini loaf pan.
- Finish with the remaining dough. It should make about 3 loaves.
- Brush the tops of the rolls with melted butter and then top with a good amount of salt. Cook in the oven for 15-20 minutes or until cooked through.
- Remove from the oven, brush with more melted butter and sprinkle with salt. Serve warm.
Notes
You can also make these into pretzel rolls or bites.
Recommended Products
As an Amazon Associate and member of other affiliate programs, I earn from qualifying purchases.
-
 Aluminum Pans Mini Loaf Pans (30 Pack) Disposable Aluminum Foil 1 Lb Small Bread Tin Pans - 1 Pound Loaf Pans - 6 x 3.5 x 2
 -
 Red Star Active Dry Yeast 16 oz (1 Pound) Size
 -
 Reynolds Kitchens Non-Stick Baking Parchment Paper Sheets - 12x16 Inch, 22 Count
 -
 Maldon Salt Company, Sea Salt Flakes, 8.5 Ounce (240 gram box)
Nutrition Information:
Yield:
16Serving Size:
1Amount Per Serving: Calories: 139Total Fat: 8gSaturated Fat: 5gTrans Fat: 0gUnsaturated Fat: 2gCholesterol: 20mgSodium: 271mgCarbohydrates: 15gFiber: 1gSugar: 2gProtein: 3g
Pizza Wheels:
What kid doesn’t like pizza? These pizza roll ups are a new twist on the old favorite. Fill them with whatever toppings you like! You can even make these ahead of time and freeze them for a quick lunch.
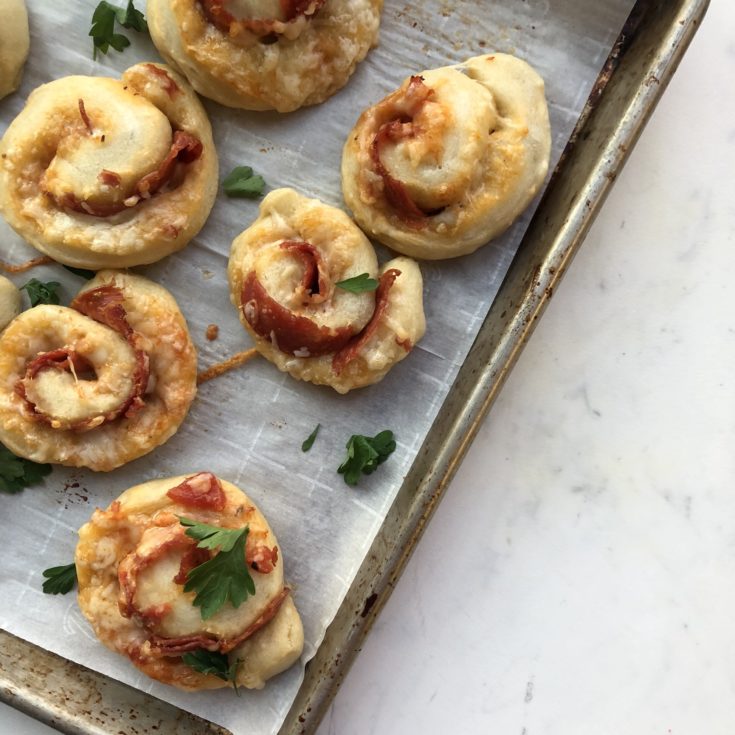
Pepperoni Pizza Wheels
On-the-go dinner for a busy weeknight meal.
Ingredients
- 1 Package Pepperoni
- 1 Cup Quattro Formaggio Cheese (Trader Joe's) or Italian Cheese Blend
- 1 Package Pre-Made Pizza Dough
- 2 Tablespoons Garlic Butter or Butter
- 2 Tablespoons Grated Parmesan Cheese
Optional:
- Marinara for Dipping
Instructions
- Preheat the oven to 400°F.
- Lightly flour a clean work surface and roll out the pizza dough into a large rectangle.
- Top with an even layer of cheese and pepperoni, leaving a 1 inch border around the outside.
- Starting on one side, roll horizontally in a very tight log. Cut into 1½ inch slices and place on a parchment-lined baking sheet.
- Brush with melted butter and top with Parmesan cheese.
- Bake for 20 minutes.
Notes
Change up the filling however you like. Try Sausage and Green Peppers or Canadian Bacon and Pineapple.
Recommended Products
As an Amazon Associate and member of other affiliate programs, I earn from qualifying purchases.
-
 Reynolds Cookie Baking Sheets Non-Stick Parchment Paper, 25 Sheet, 4 Count (100 Total)
 -
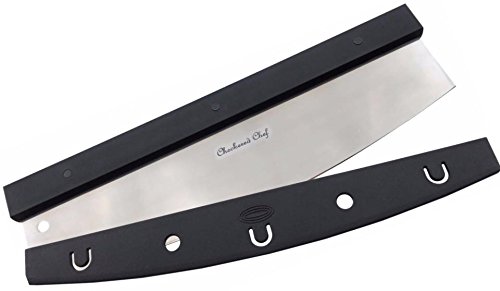 Premium Pizza Cutter by Checkered Chef - Rocker Blade With Protective Cover/Case/Holder/Sheath. Heavy Duty Stainless Steel with Premium Comfort Grip Handle. Dishwasher Safe.
 -
 OXO Good Grips Non-Stick Pro Jelly Roll 10 x 15 Inch
Nutrition Information:
Yield:
12Serving Size:
1Amount Per Serving: Calories: 128Total Fat: 9gSaturated Fat: 5gTrans Fat: 0gUnsaturated Fat: 3gCholesterol: 40mgSodium: 291mgCarbohydrates: 3gFiber: 0gSugar: 1gProtein: 10g
Homemade Uncrustables:
My kids love uncrustables and I love that we can make a healthier version at home. If your children have a peanut allergy you can use Sunbutter or a nut butter that works for them. We make a bunch of these and put them in baggies. I like to write a little note on each one and then throw them in the freezer for a quick lunch.
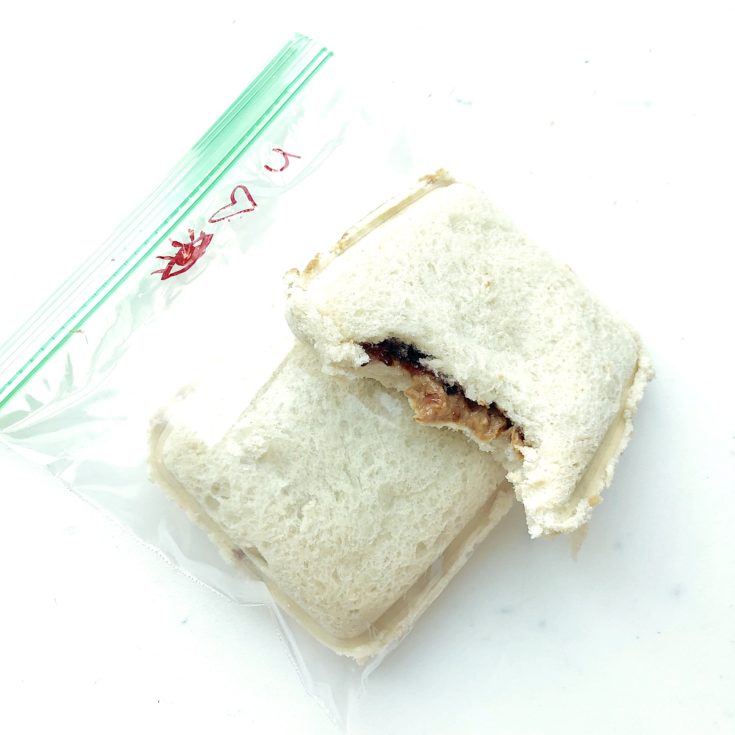
Homemade Uncrustables
Make a big batch and freeze for an easy lunchbox sandwich.
Ingredients
- 2 Slices White or Wheat Bread
- 2 Tablespoons Peanut Butter
- 1 Tablespoon Jelly Of Choice
Instructions
- Place bread on a flat work surface.
- Spread the middle with peanut butter and top with jelly. Leave 1/2 Inch border around the outside of the bread.
- Top with the other slice of the bread.
- Using a sandwich mold, press the sandwich down firmly. Cut the remaining crust from the edges. Place in bags and freeze.
*Place in your child's lunch pail in the morning and it's thawed by lunch.
Recommended Products
As an Amazon Associate and member of other affiliate programs, I earn from qualifying purchases.

Even better is that they are the perfect recipe for learning something new anytime of year, especially now! Check out my Instagram @Kids.Cooking.Recipes for more recipes, tricks, and tips geared towards kids in the kitchen.
Friends, continue to physically distance yourselves while continuing to be social — check-in on others and socially share love and encouragement.
I don’t know the outcome of the 2020 pandemic, but I do know if you take some time to disconnect from the world, you will have a wonderful opportunity to create positive and memorable experiences with your loved ones.
xoxo,
Meg
Need even more easy recipes for kids to try? Check out my Ice Cream in a Bag for Kids!